Here is how to set up an aquarium step by step: pick a level spot rated for the tank's full weight, put the power supply on a GFCI outlet with drip-looped cords, rinse the tank and substrate, position the filter and heater without switching them on, add substrate and decor, fill with dechlorinated water, then power on and watch for leaks before you start the nitrogen cycle. The two hazards that matter most here are a full tank's weight on an unrated surface, and electricity running near open water. Both get their own section below.
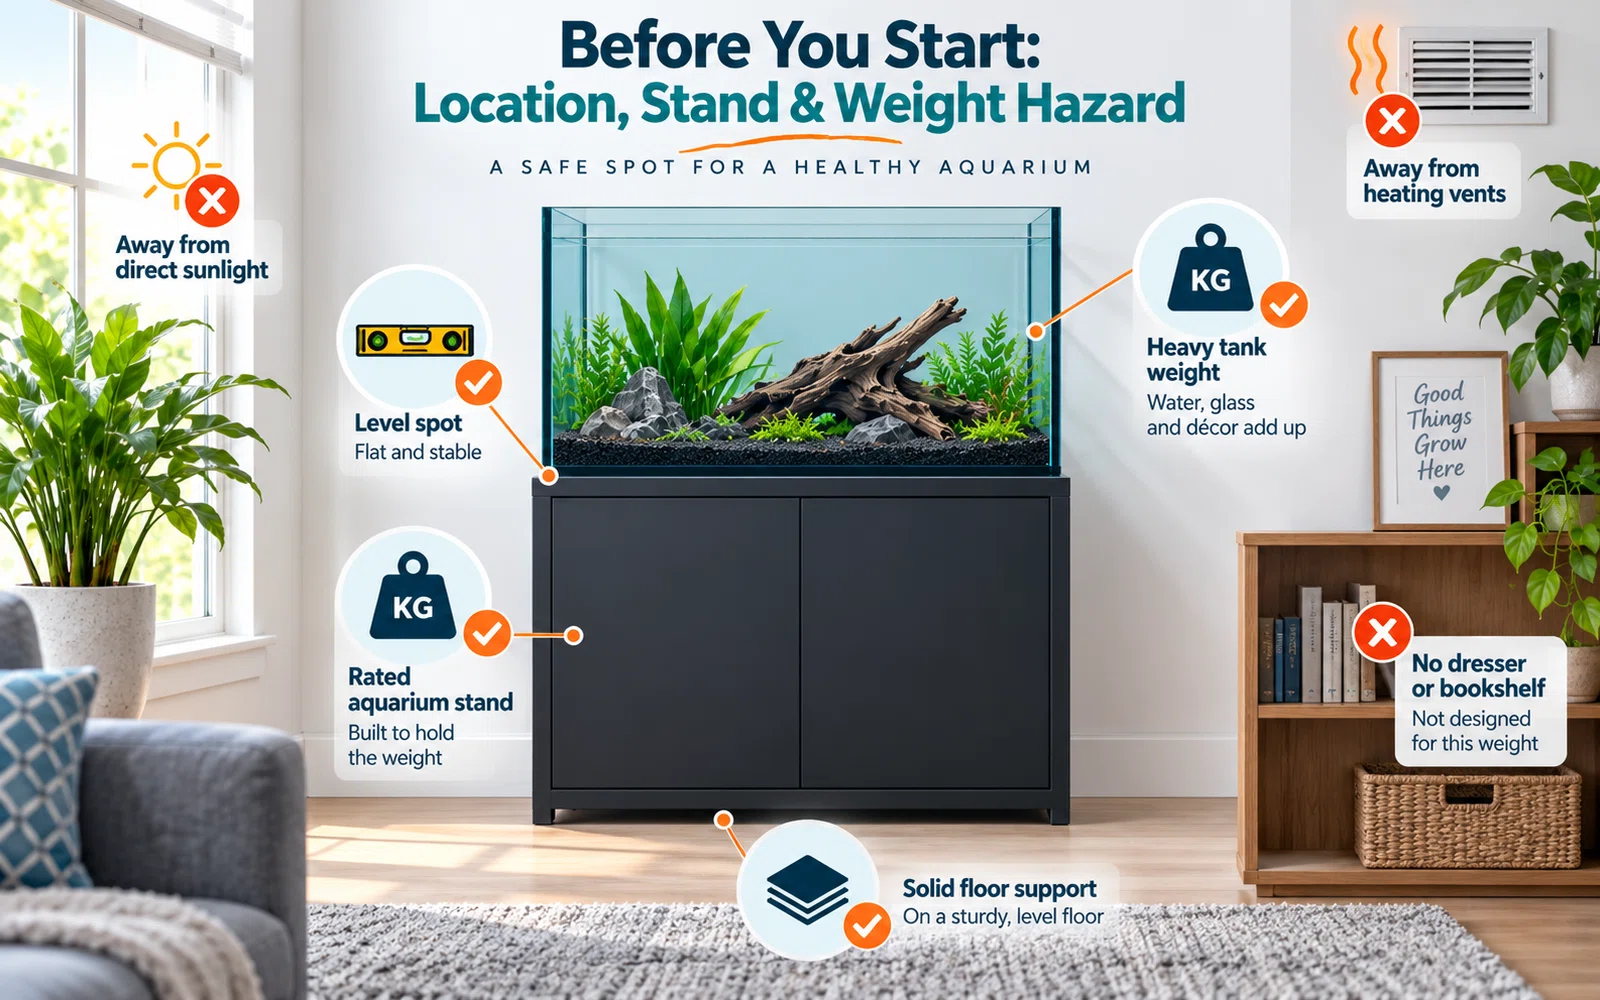
Before You Start: Location, Stand and the Weight Hazard
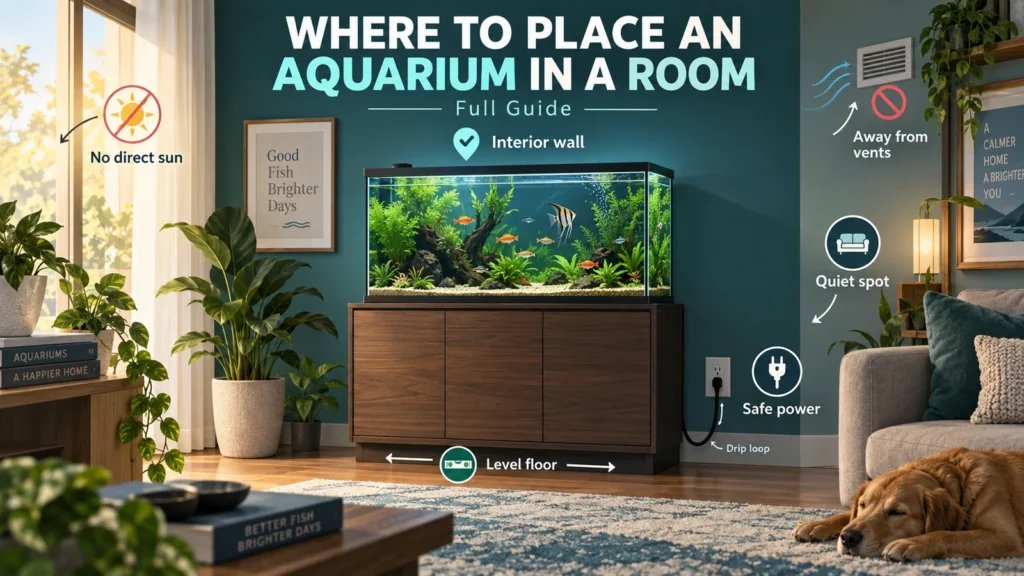
Pick the spot before you buy anything else. It needs to be level, away from direct sun and heating vents (both push temperature around, which stresses fish later), and close enough to an outlet that you are not tempted to run a long extension cord across a walkway.
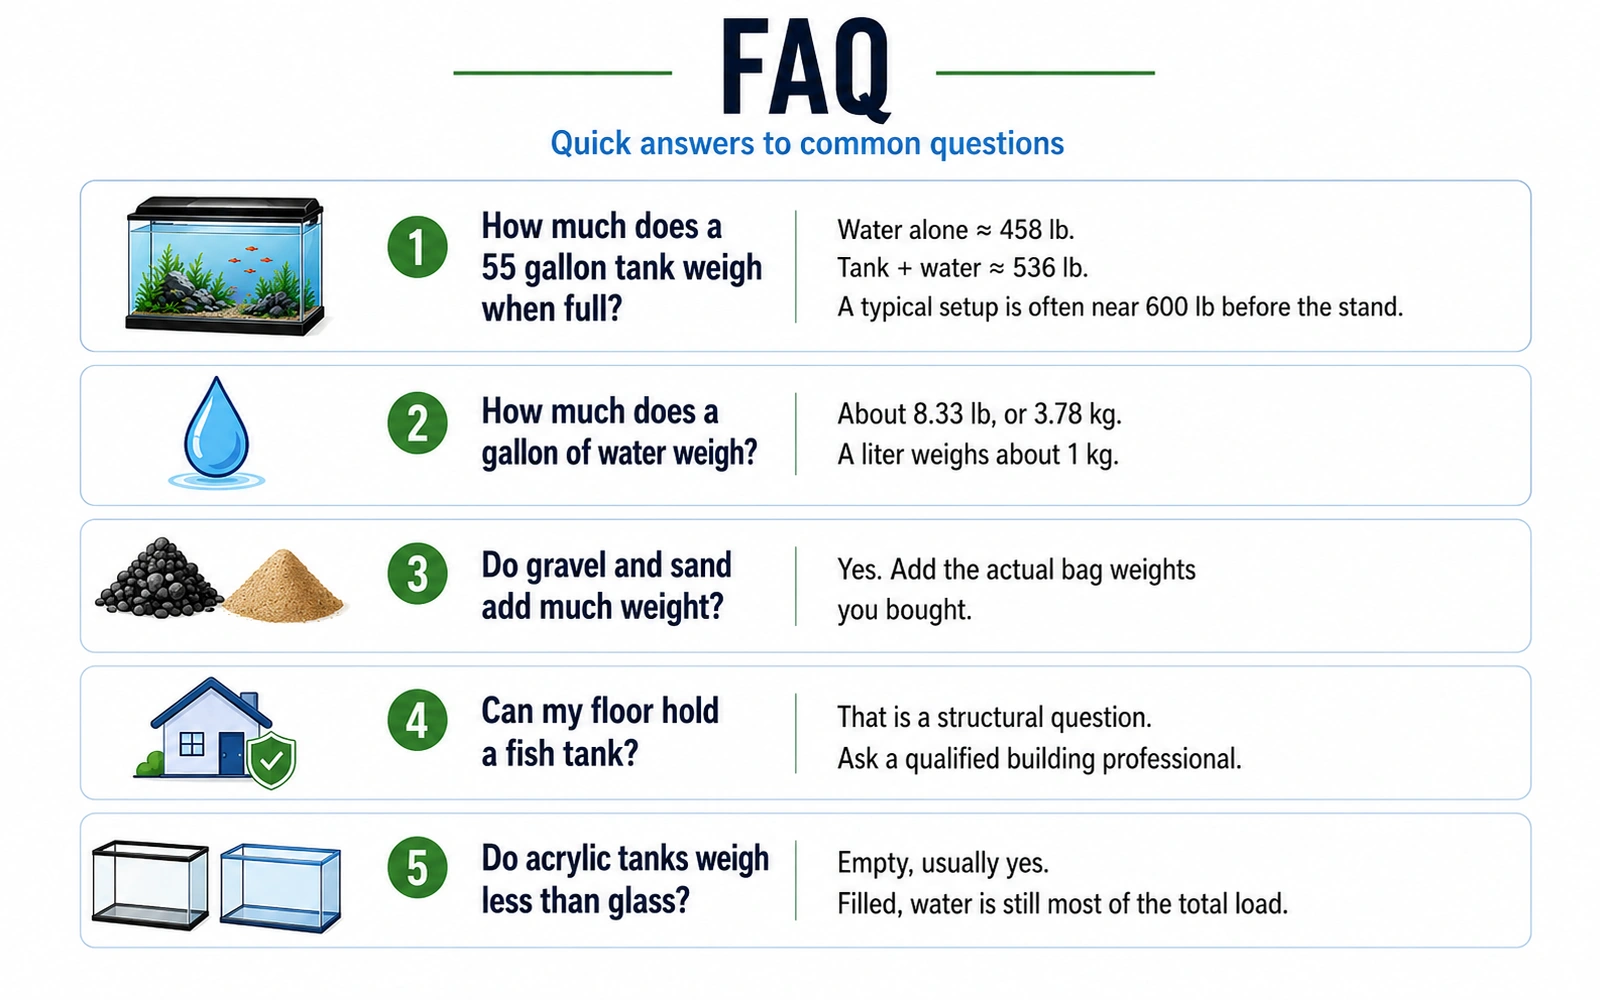
The part beginners underestimate is weight. Water alone runs a little over eight pounds per US gallon, and that is before the glass or acrylic shell, the stand, the substrate and any rockwork are added in. A modest tank can pass into the hundreds of pounds once it is filled, concentrated on a footprint the size of a coffee table. If you want the exact math for your tank size, How Much Does a Fish Tank Weigh? Full Weight Formula walks through it.
State this plainly: a stand, shelf or table that is not built and rated for that load can buckle or crack, and a tank that drops even a short distance usually fails completely. That is not a spill, it is the full weight of the water and often broken glass released at once, onto the floor and onto anyone standing nearby. Use a stand rated by its manufacturer for the tank's filled weight, confirm the floor under it is solid (a corner or a location over a joist is stronger than the center of a long unsupported span in an upper-floor room), and never trust an ordinary bookshelf or dresser with a large tank.
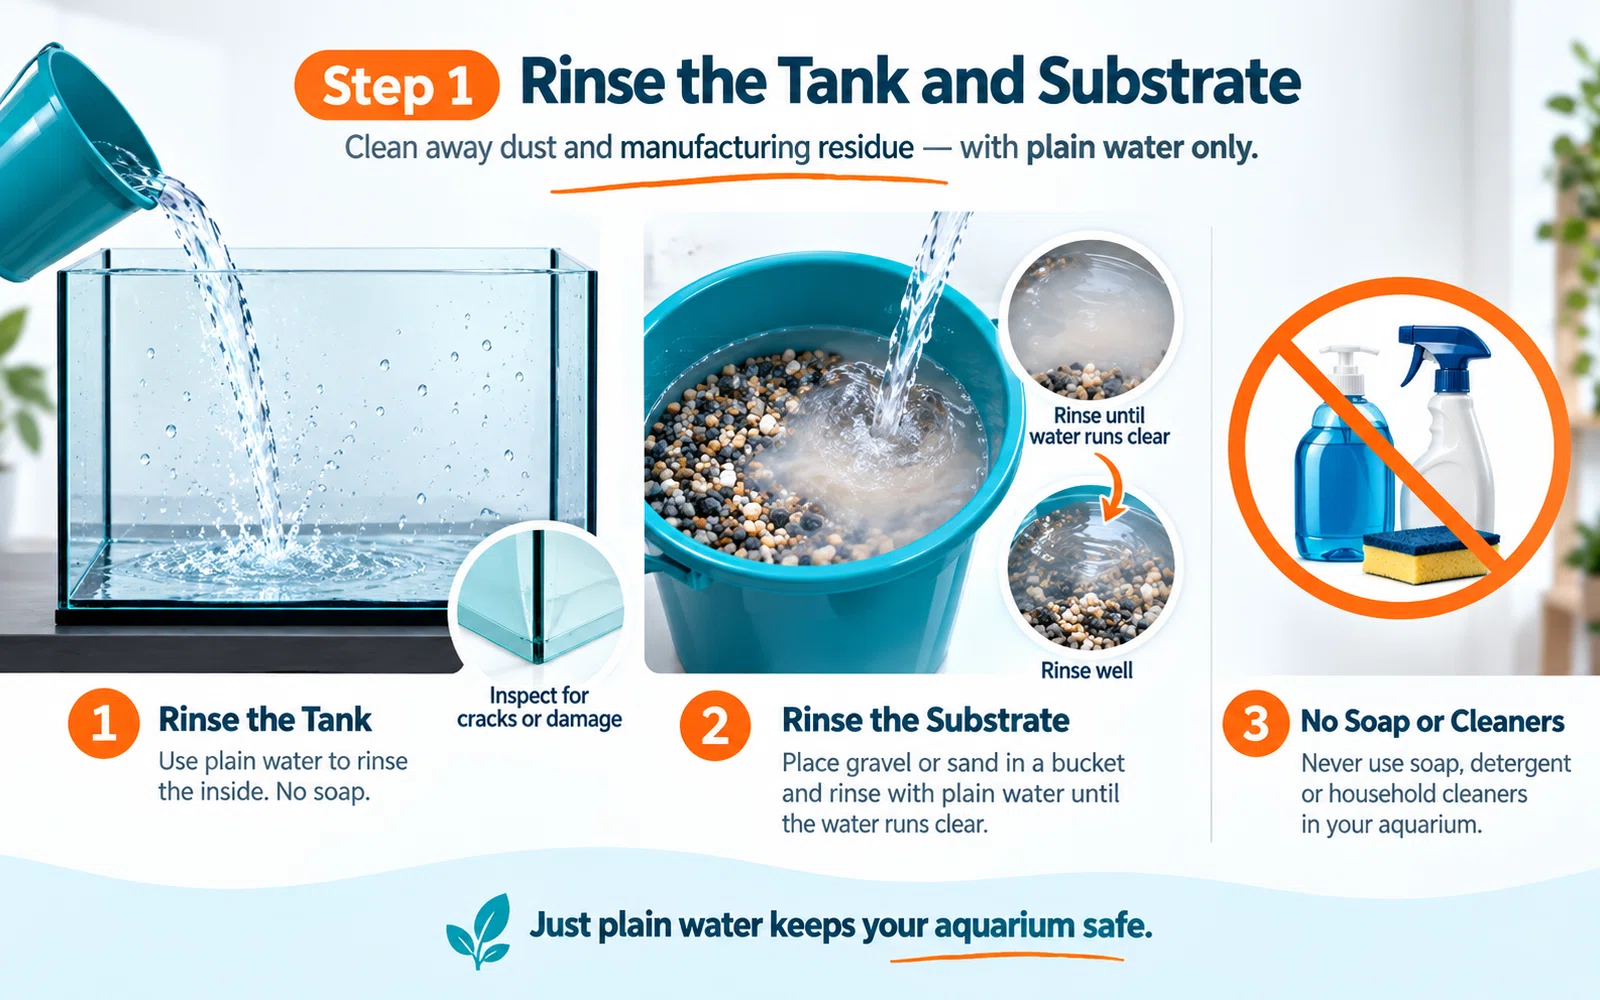
Step 1: Rinse the Tank and Substrate
Check the empty tank first, inside and out, for scratches or hairline cracks, especially near the corners and the bottom edge. A tank that is going to fail is more likely to show a warning sign now than later.
Rinse the inside with plain water only. No soap, no household cleaner and no residue from either: both leave a film that is toxic to fish and hard to rinse fully out of silicone seams.
Rinse the substrate in a bucket, outside if you can, until the water runs close to clear. Gravel and sand both carry a surprising amount of dust straight from the bag, and skipping this step is the single most common reason a brand new tank stays cloudy for days.
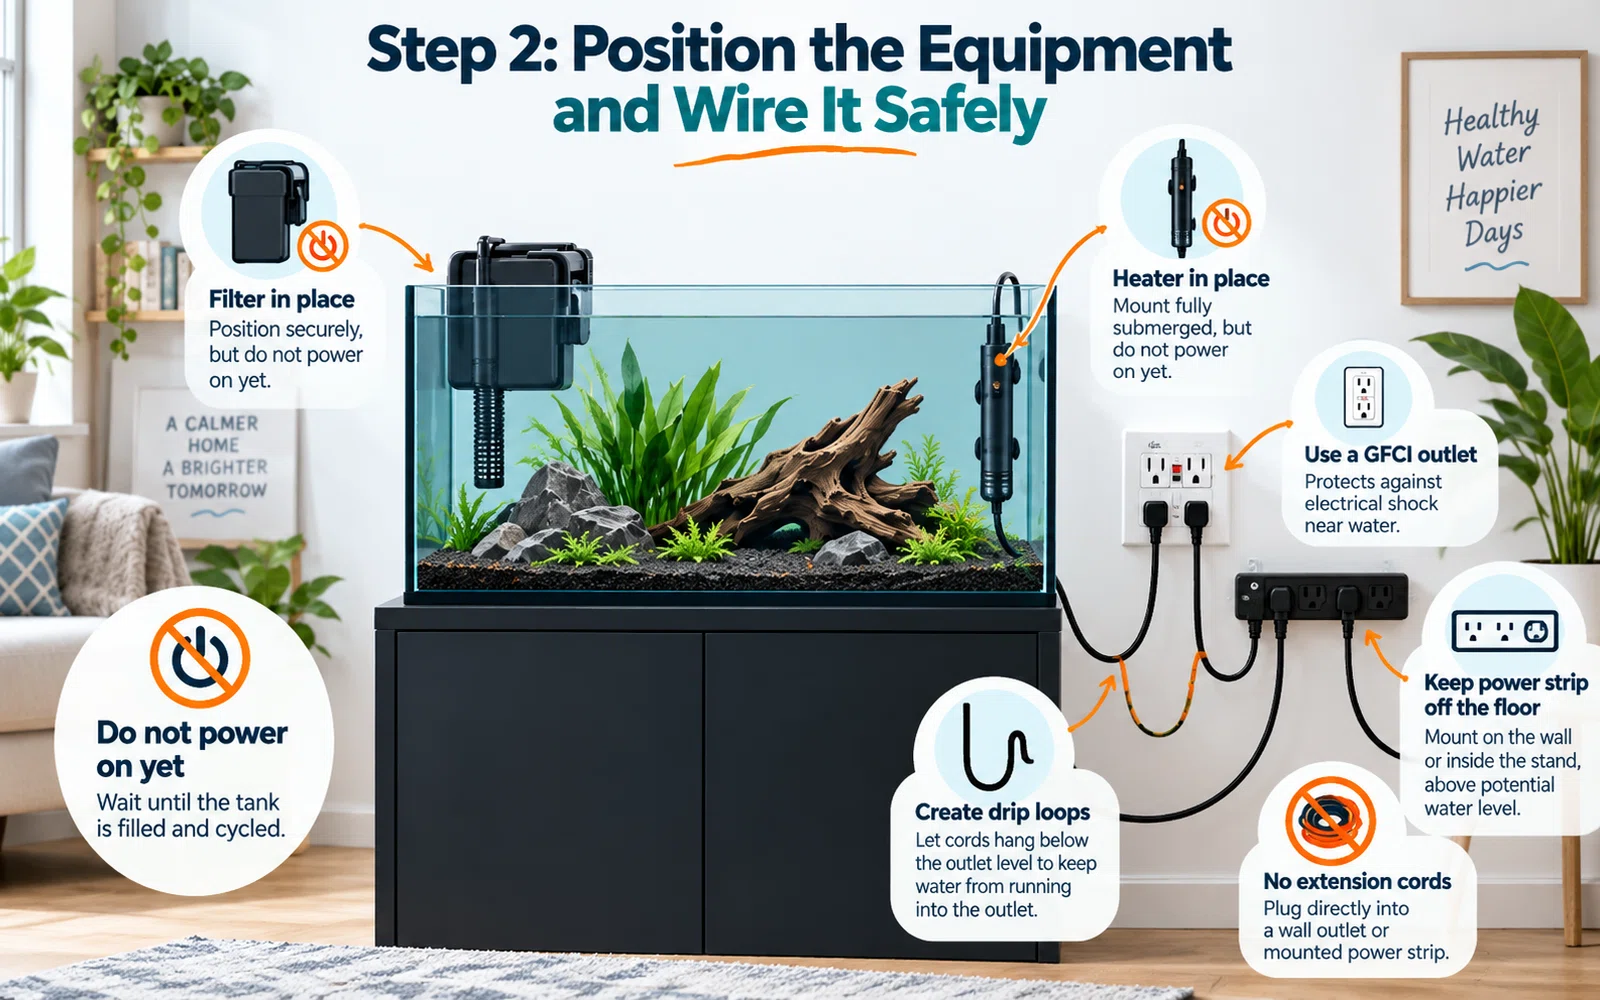
Step 2: Position the Equipment and Wire It Safely (Do Not Power On Yet)
Set the filter and heater where they will sit once the tank has water, but leave both switched off. A heater run dry, even for a minute, can crack, and a filter run dry can damage its motor. Use this stage to plan cord routing, not to start the equipment.
This is where the electrical hazard lives, and it deserves to be named plainly: you are about to run mains electricity within arm's reach of a large body of open water, on top of furniture, for years. Two things address that directly. First, plug every piece of aquarium equipment into a GFCI (ground fault circuit interrupter) outlet or a GFCI-protected power strip, not a standard outlet. The U.S. Consumer Product Safety Commission's GFCI fact sheet (read 2026-09-18) explains that a GFCI constantly compares the current going out to the current coming back, and cuts power in a fraction of a second if any of it is leaking through an unintended path, such as through water or a person. A standard breaker does not do this fast enough to prevent a serious shock. Second, give every cord a drip loop: route the cord so it dips below the level of the outlet before it rises back up to plug in, so that any water running down the cord drips off at the low point instead of running straight into the socket. Mount power strips above the tank's water line, not on the floor beneath it, and test the GFCI's own test button monthly once everything is running.
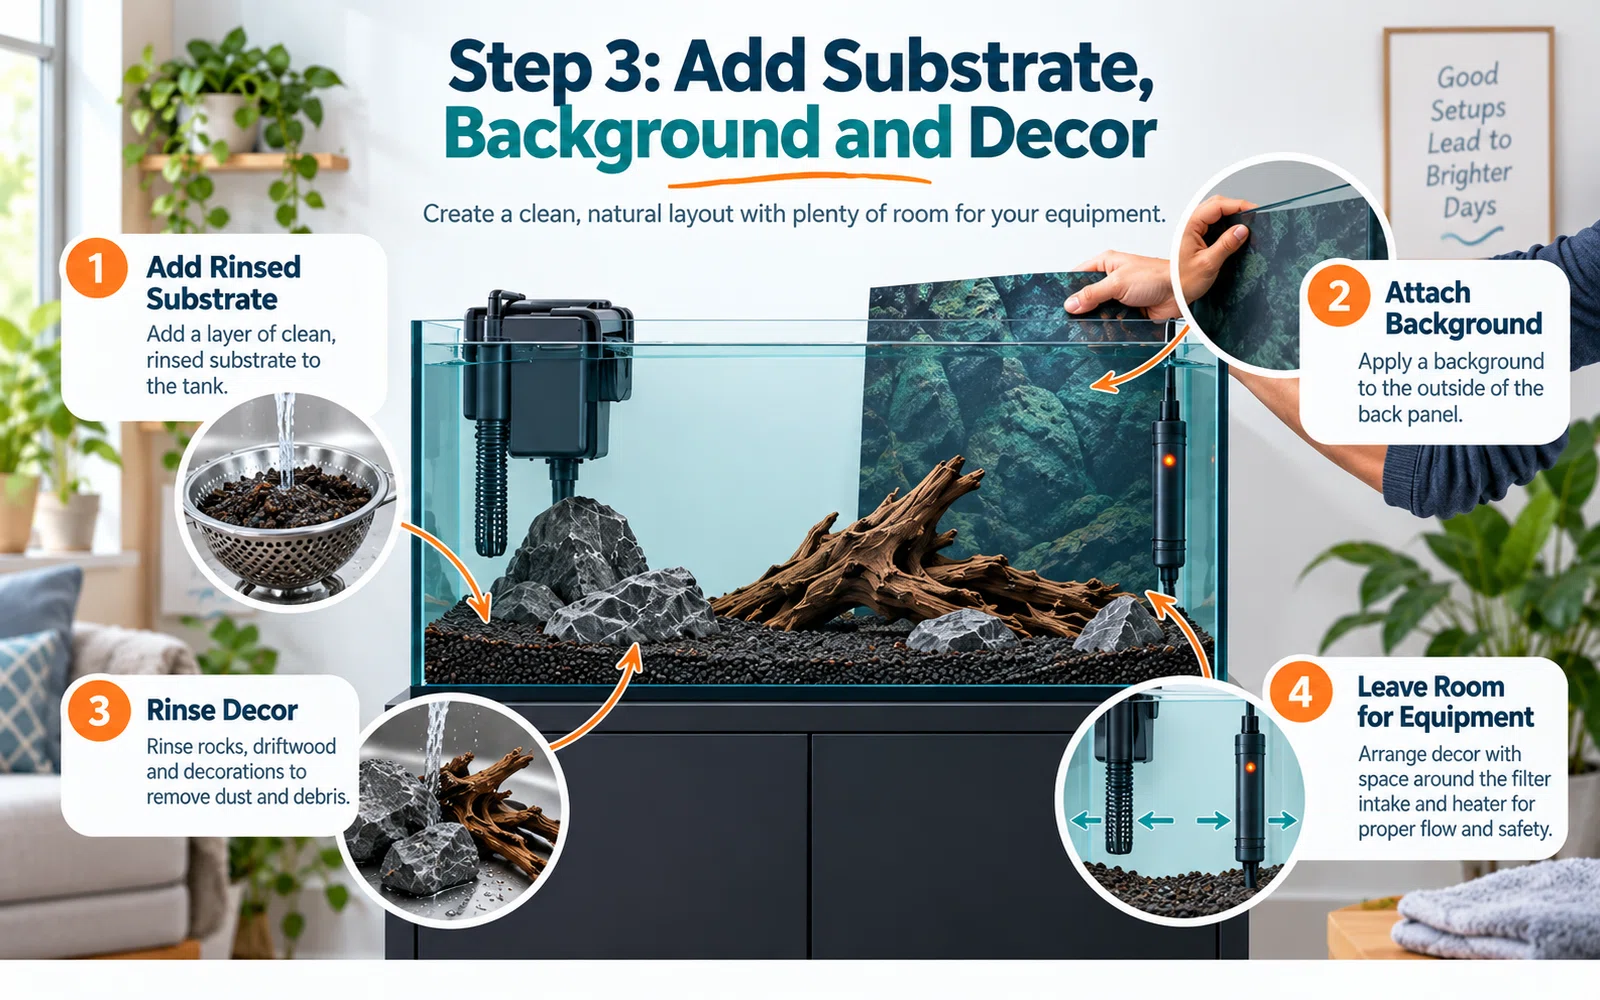
Step 3: Add Substrate, Background and Decor
Spread the rinsed substrate across the bottom, sloping it slightly toward the back if you like the look. Add a background to the outside of the back panel now, while the tank is still light and easy to move. Rinse any decorations and hardscape before they go in, and arrange them loosely enough that the heater and filter intake have room to work; do not wedge decor tight against either.
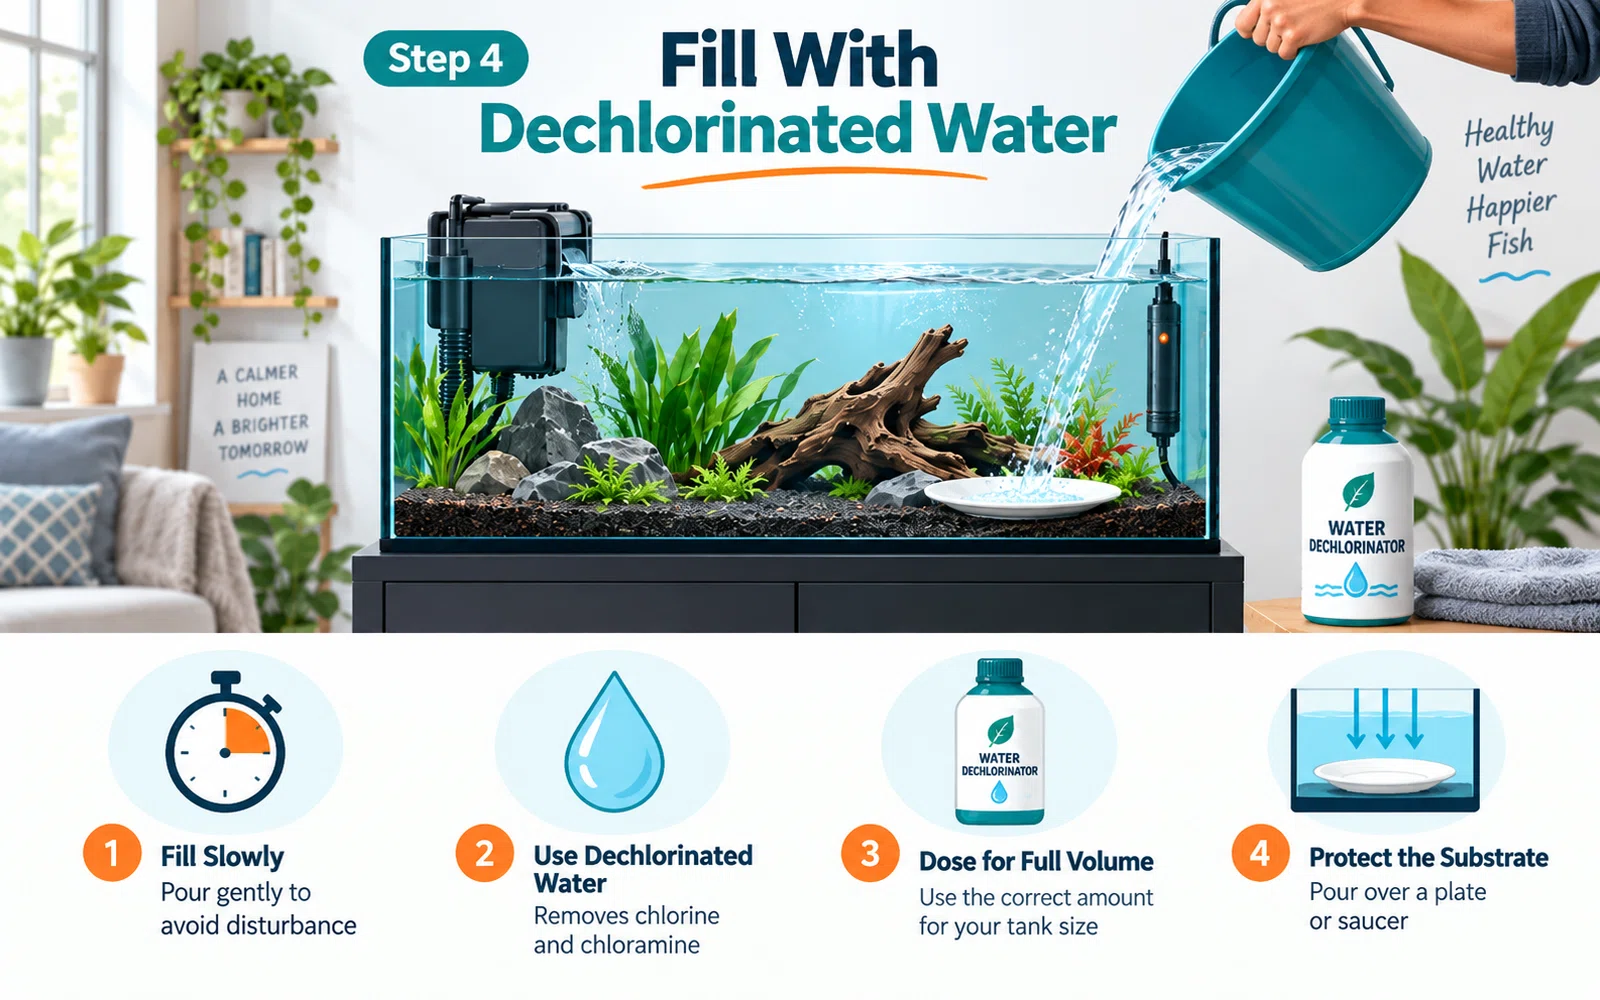
Step 4: Fill With Dechlorinated Water
Fill slowly, pouring onto a plate, a saucer or your cupped hand so the stream does not blast a crater into the substrate you just leveled. Most tap water in the US and UK carries chlorine, chloramine, or both, added specifically to make it safe for people; both are toxic to fish and to the beneficial bacteria you are about to spend weeks cultivating. Add a liquid water conditioner (dechlorinator) dosed for the full volume of water you have added, checking the label for the treated volume per dose. Chlorine alone will evaporate off over a day or two if you have no other option, but chloramine will not, so a conditioner rated for both is the safer default if you are not certain which your supply uses.
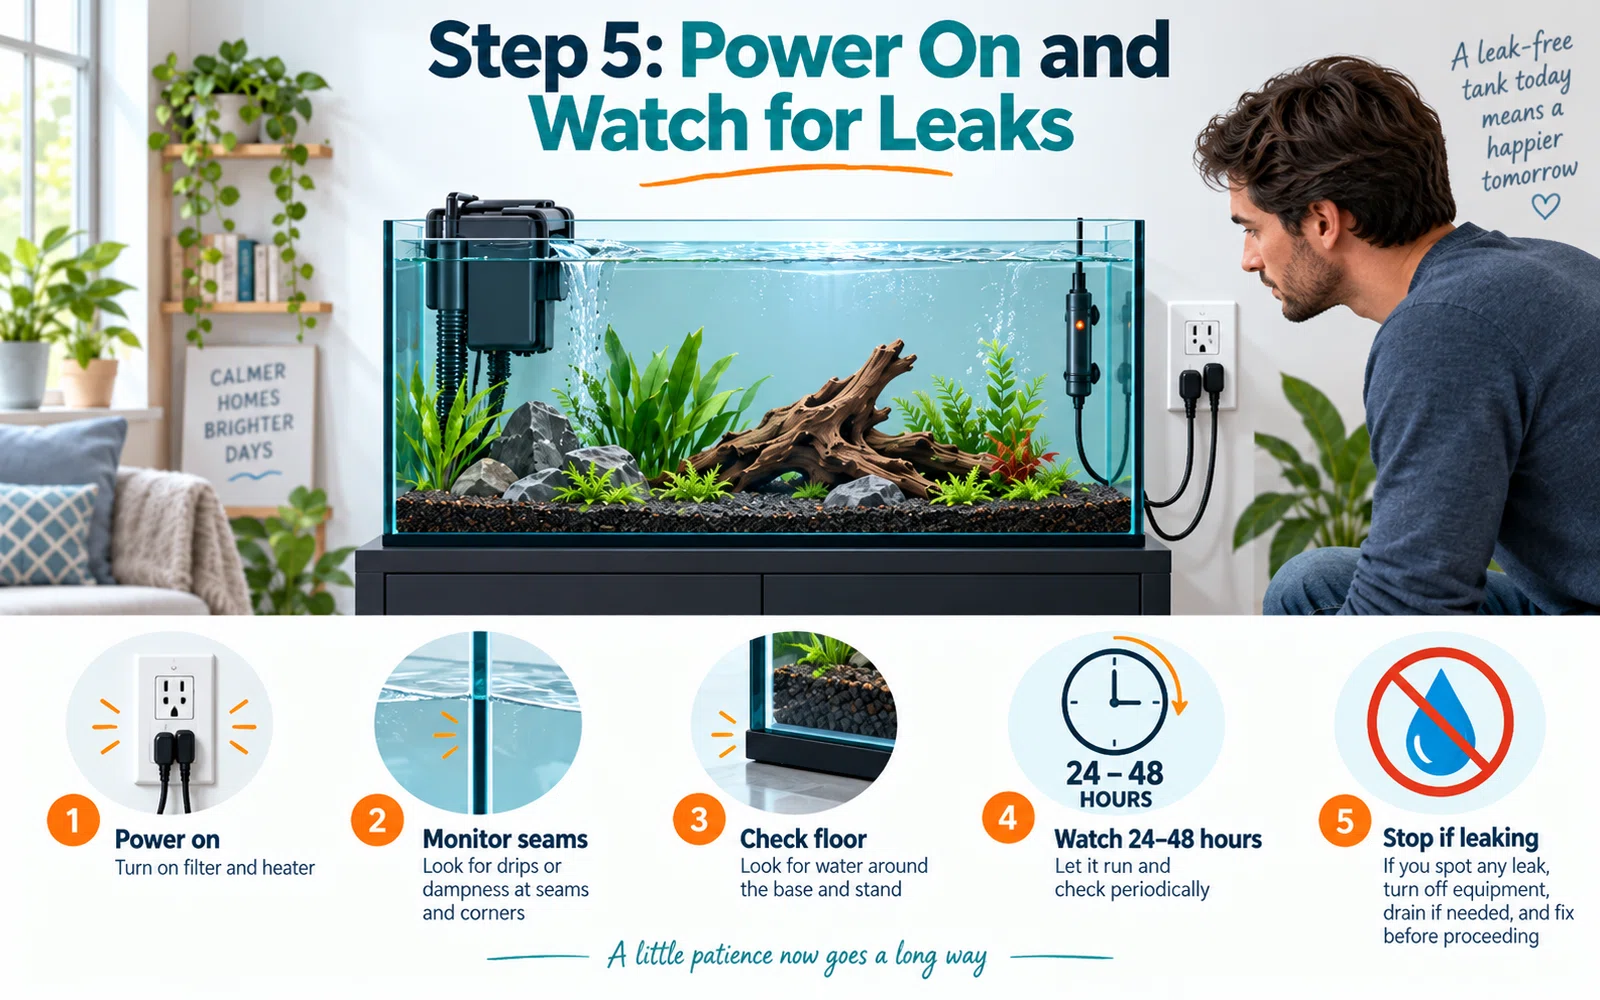
Step 5: Power On and Watch Before You Trust the Tank
Once the tank is filled to its working level, switch on the filter and heater. Set the heater toward the middle of the range appropriate for the fish you eventually plan to keep; many common community species are comfortable somewhere in the mid-70s to low-80s Fahrenheit, but check the specific species' care information rather than treating any single number as universal, since needs vary by species. Expect the temperature to take about a day to settle.
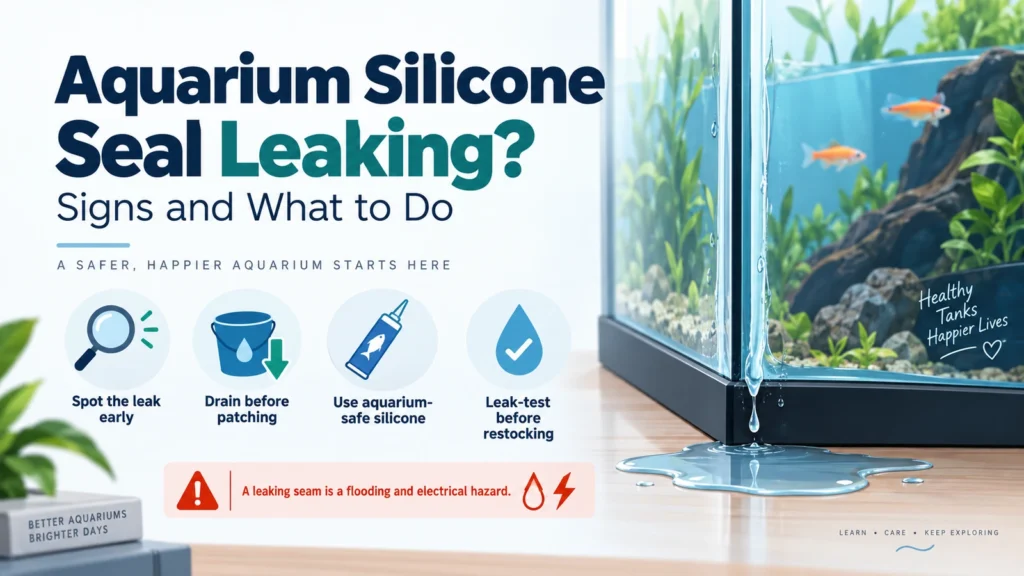
Now watch it. Check the tank at intervals over the next 24 to 48 hours: the water level, the seams, the floor around the base and the cords. This is the single most useful habit in this whole process, because a slow seam weep is easy to miss and easy to fix early, and hard to miss once it has become a real leak.
If you see any water at a seam, a corner, or pooling at the base during this watch period or at any point later, treat it as urgent. Do not wait to see if it stops, and do not attempt to reseal or resilicone the tank while it is still full: a DIY reseal on a loaded tank does not hold and risks the seam letting go completely while you are working on it. Drain the tank down right away, dry the frame and seams fully, and have the glass and silicone inspected by the manufacturer or a qualified aquarium technician before refilling. A full-size tank failing at speed is both a flooding hazard and a heavy-glass injury hazard at once, and it is not a repair to attempt live.
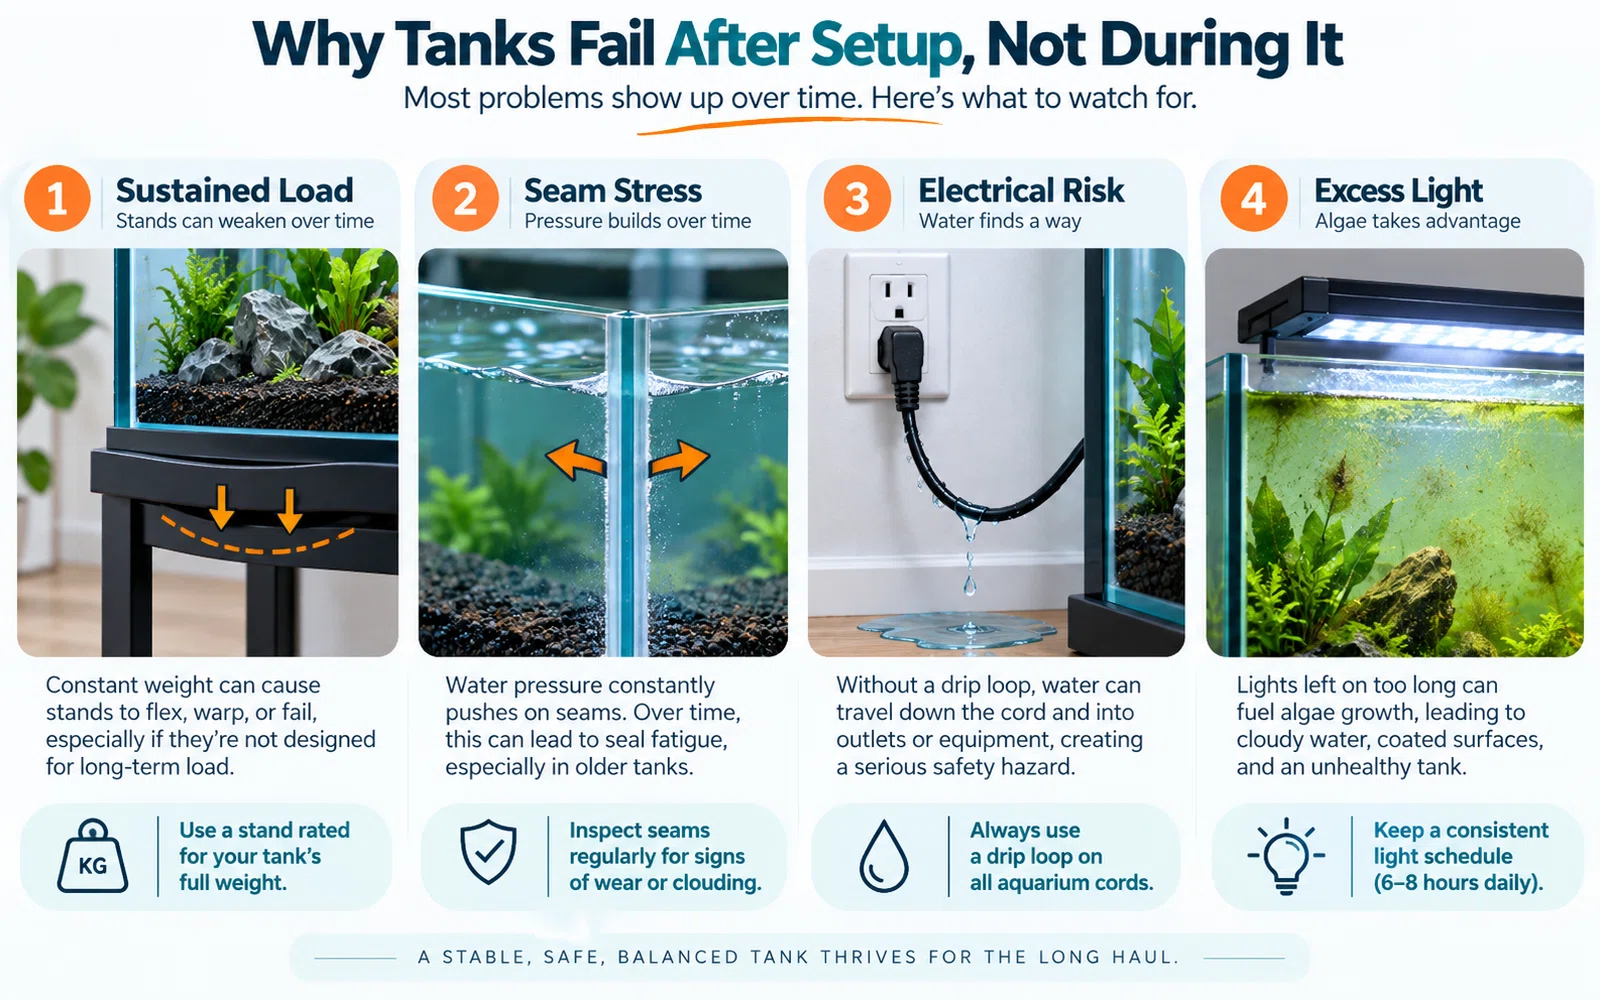
Why Tanks "Fail" After Setup, Not During It
Most tank problems do not show up while you are building the thing. They show up under sustained load: a stand that felt solid empty starts to flex once it is carrying real weight, a cord left without a drip loop stays fine until the day a splash finally runs down it, a seam under constant hydrostatic pressure lets go months in, not on day one. That is the real argument for the 24 to 48 hour watch period before you consider the physical setup finished, and for checking the stand and cords again periodically after that, not just once.
The same "shows up under load" pattern applies to lighting. Running the light many more hours a day than the tank needs, especially during the early weeks, is the most common reason new aquariums develop algae before anything else has even settled in. Six to eight hours a day on a timer is enough while the tank is new; if green spots have already appeared on the glass, that has a specific, sourced fix in Green Spot Algae on Aquarium Glass: Causes and Removal.
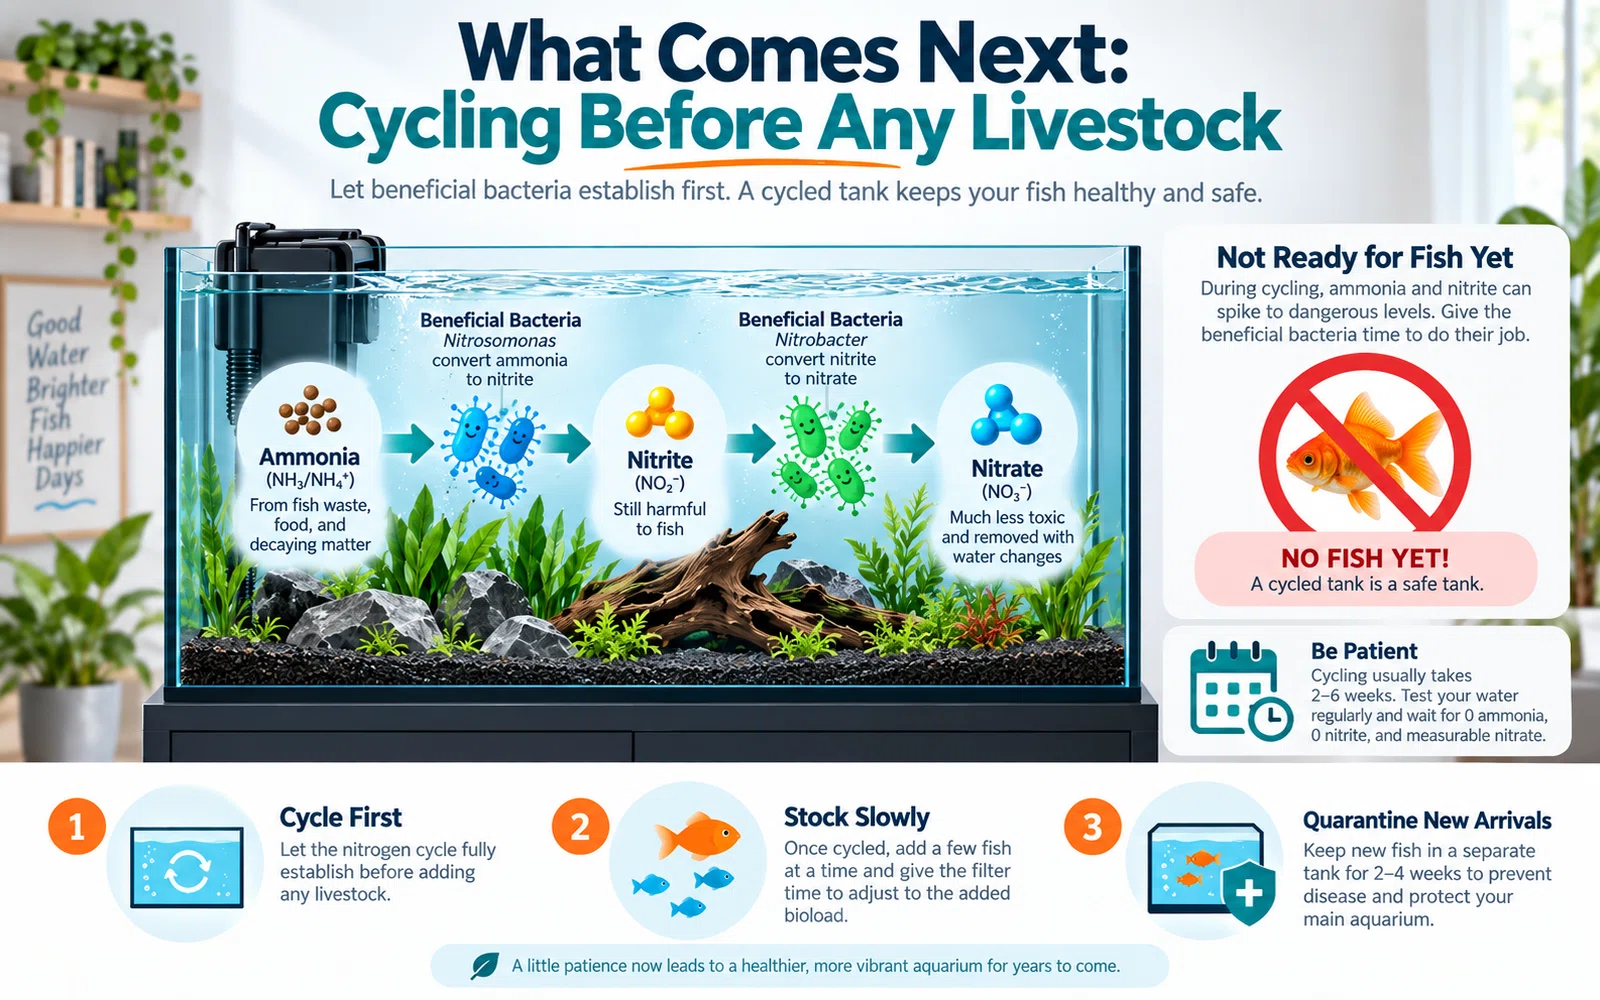
What Comes Next: Cycling Before Any Livestock
A tank that is physically finished is not a tank that is ready for fish, shrimp or snails. It still needs to complete the nitrogen cycle, the weeks-long process that grows the bacteria able to process fish waste before it becomes toxic. Do not use this stage to decide how many animals to add; a stocking decision should be based on each species' adult size, social needs and the tank's actual cycled capacity, never on how many will visually fit once the water is in. Fish welfare organizations are direct about this: the RSPCA's fish care guidance (read 2026-09-18) stresses that fish have specific space and companionship needs by species, and that sourcing and stocking decisions should follow that research, not the tank's appearance.
Once the tank is cycled, resist the instinct to add everything at once. Is Your Tank Actually Ready for Shrimp? Cycled Is Not Enough covers why a finished cycle is necessary but not sufficient. New livestock, whether it is the first fish or an addition later, also belongs in a separate holding tank first; see Quarantine: The Cheapest Insurance in the Hobby for why. If any animal shows sudden distress, refuses to eat for more than a day or two, or looks physically wrong at any stage, treat it as a job for an aquatic veterinarian rather than a guess from a forum thread; guesswork on a sick animal costs more time than the wait for a real answer.
FAQ
Do I really have to wait 24 to 48 hours before I do anything else with a new tank? Yes, for the physical setup. That window is how you catch a slow leak or a wobbling stand before either becomes a bigger problem. The nitrogen cycle that comes after this stage takes considerably longer, typically weeks.
Can I use a regular power strip instead of a GFCI outlet? No. A standard power strip does not add the ground-fault protection that cuts power in a fraction of a second when current leaks through water. Plug aquarium equipment into a GFCI-protected outlet or a GFCI power strip, and route every cord with a drip loop.
What temperature should I set the heater to during setup? There is no single universal number; the right target depends on the species you plan to keep. Set it toward the middle of that species' documented comfortable range and confirm with a separate thermometer, since heater dials can be inaccurate.
My new tank looks cloudy right after filling. Did I do something wrong? Not necessarily. Fine substrate dust or a harmless bacterial bloom can cloud a brand new tank for a day or two. It is a different issue from the algae that develops over the following weeks if the light runs too long, which is covered above.
Is it safe to set up a secondhand or used aquarium the same way? Inspect it even more carefully first. Old silicone seams degrade with age and sun exposure, so check every seam for cracking, yellowing or separation before you rely on this sequence, and consider a professional seam inspection for any tank whose history you do not know.