"It is only a little off. Does that actually matter?" It does, and the reason is not how it looks.
Level the stand before the tank goes on: with the stand empty and in its final spot, check it with a spirit level front to back and side to side, shim under the stand's contact points (never under the glass) until it reads level both ways, then set the empty tank, check again, and only then add water. A filled tank cannot be adjusted safely, and Wikipedia's aquarium article notes that "a tank that is not level may distort, leak, or crack."
This page explains why a small tilt matters, the step-by-step method, and what to do if you find a problem after the tank is full.
Why Level Matters: Water Always Finds Its Own Level
A tank is a box built to hold water pressing evenly on its seams. Two things go wrong when it sits at an angle.
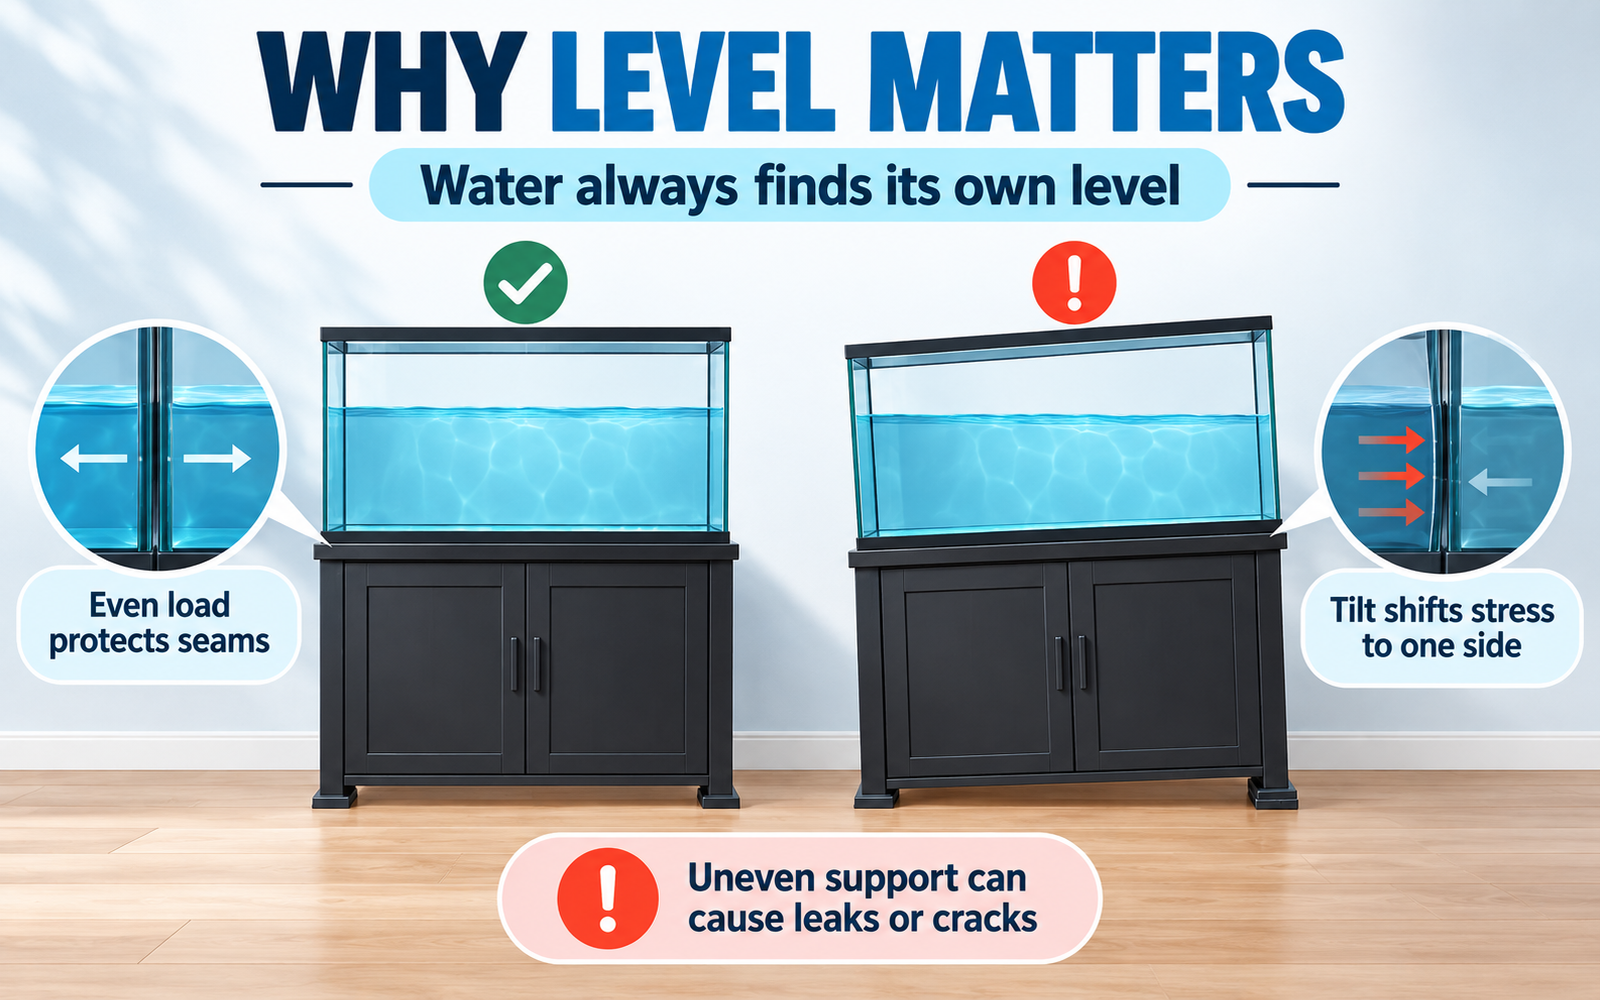
The load shifts. A filled tank is heavy, often hundreds of pounds, as our article on how much a fish tank weighs shows. Tilt it and more of that weight bears on one side and one end, and on the seams there.
The support becomes uneven. A stand or floor that is out of level is often also out of flat. Instead of resting evenly, the tank sits harder on a few points. Glass does not bend to spread that out. It concentrates the stress, and stress points are where glass and silicone seams give way.
The failure is usually not immediate. A seam carrying extra stress can hold for months before it weeps. That is why this is a setup job, not something to fix later.
What You Need
- A spirit level long enough to span a good part of the stand, ideally close to the length of the top. Short levels miss twists across a long surface.
- Shims made of a material that will not compress or rot, such as composite or plastic shims. Soft materials squash under a continuous load over time.
- The tank maker's instructions, for any tolerance they specify and whether a mat goes under the tank.
- A helper for placing the tank.
Check your level first. Place it on a flat surface, note the bubble, turn it end for end in the same spot, and check again. If the bubble reads differently, the level itself is off and will mislead you.

How to Level an Aquarium Stand, Step by Step
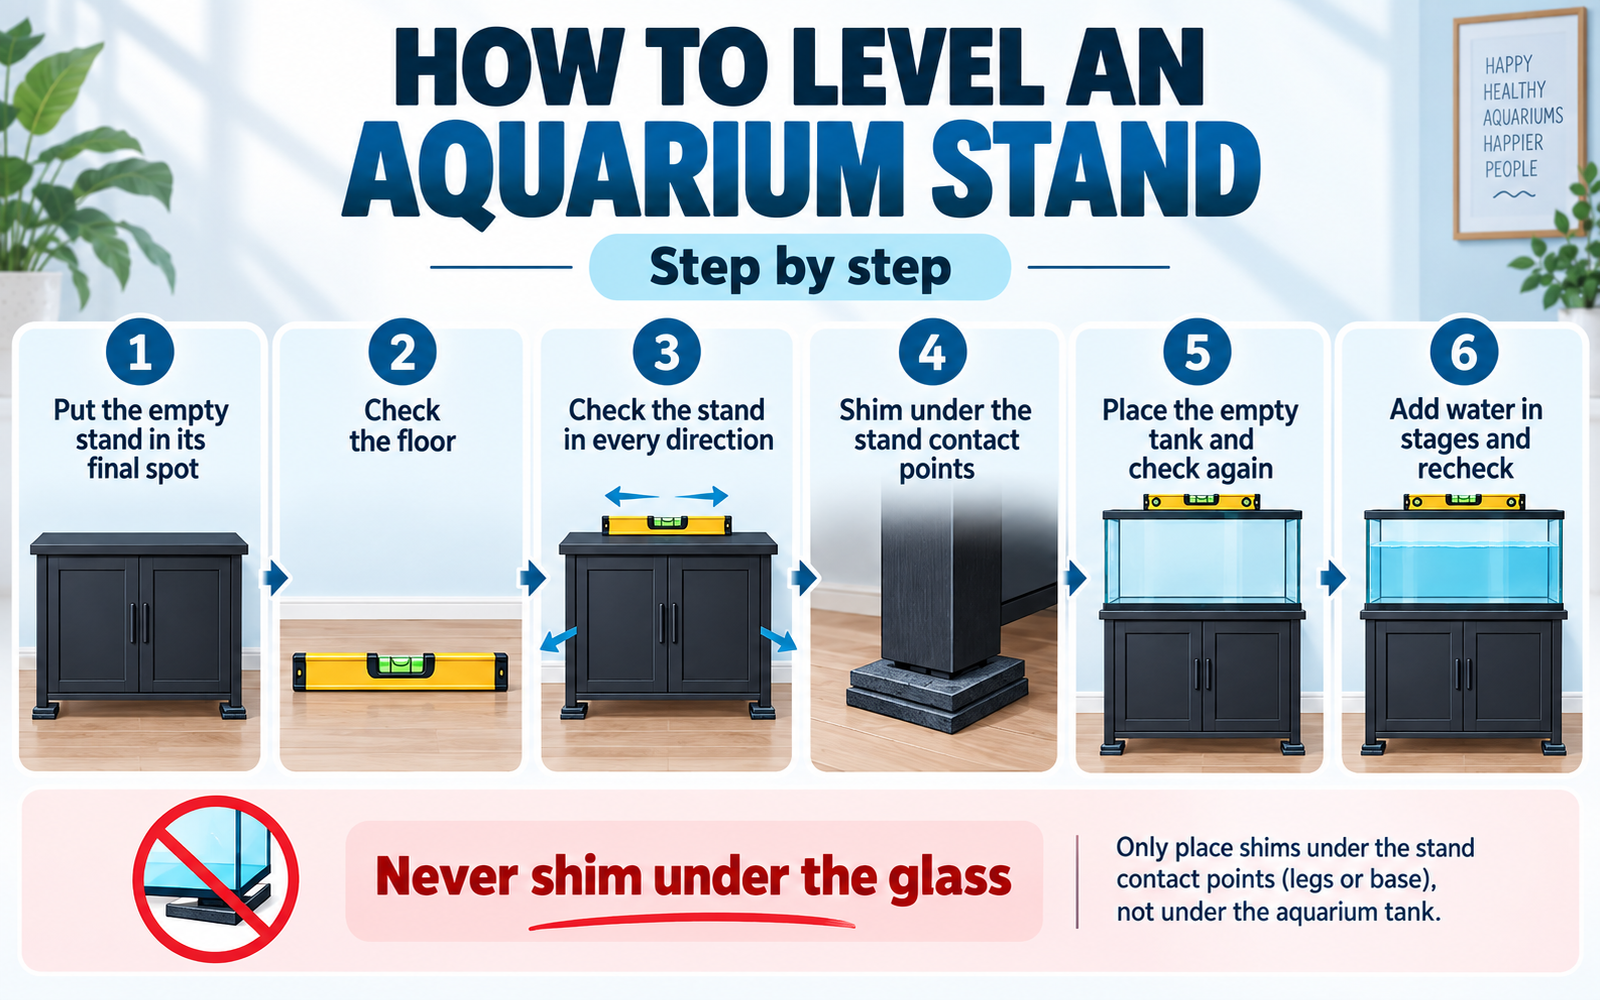
- Put the empty stand in its final position. Leave a gap behind it for cords and drip loops. Once the tank is full, this spot is permanent.
- Check the floor first. Lay the level on the floor where the stand will stand. A floor badly out of level, or one that slopes more at one point than another, can be a sign of a structural issue. If it looks significant, stop and have a builder or structural engineer look before going further.
- Check the stand top in every direction. Front to back at both ends, side to side along the front and back edges, and diagonally corner to corner. The diagonals catch a twist that the edges miss.
- Find the low points. Note which corners or legs need raising.
- Shim under the stand, at its contact points. Slide shims under the legs or base where the stand meets the floor, directly beneath the stand's vertical supports. Raise the low side rather than trying to push down the high side. Add shims gradually and recheck after each adjustment.
- Make sure every support is carrying load. The stand should not rock on any corner. Press on each corner; nothing should move.
- Trim or conceal shim ends so they are not kicked out later.
- Place the empty tank, following the maker's instructions on any mat. Check level again on the tank's own rim, in every direction.
- Add some water and check again. Do not fill in one go. Add water in stages and look at the water line against the rim each time. If anything changes, stop, drain and fix it.
- Recheck after a few days and again after the first weeks. Carpet and flooring can compress under a new load.
Why never under the glass
Shims under a tank put its load on small points, which is the opposite of what the tank needs. Framed tanks are meant to rest their frame on a flat, level stand top; rimless tanks usually need even support across the whole base. Level the stand, not the tank.
Mats and cushioning
Wikipedia's aquarium article mentions the practice of placing tanks on polystyrene to cushion irregularities. Tank makers differ on this, especially between framed and rimless designs, and some warranties depend on following their instructions. A mat is not a substitute for a level stand. It deals with tiny surface imperfections, not a tilt. Use one only as your tank's maker directs.
Carpet, Tile and Wood: What Changes
Carpet compresses under a heavy load, sometimes unevenly, so a stand that reads level on day one can drift. Rechecking in the first weeks is essential. Some keepers place the stand on a firmer surface over the carpet; whether that is appropriate for your floor is a question for the tank and stand makers, and for a builder if you have any structural concern.

Tile can have uneven grout lines and a slight lip between tiles. Check that every leg sits on a solid surface.
Wood floors may have a slope along the boards. Check across and along them.
The Water Line Is Your Ongoing Level Check
Once the tank is full, the water surface is always level, which makes it a free, permanent spirit level. Look at the gap between the water line and the top rim at each end. If the gap is visibly larger at one end than the other, the tank is tilting.
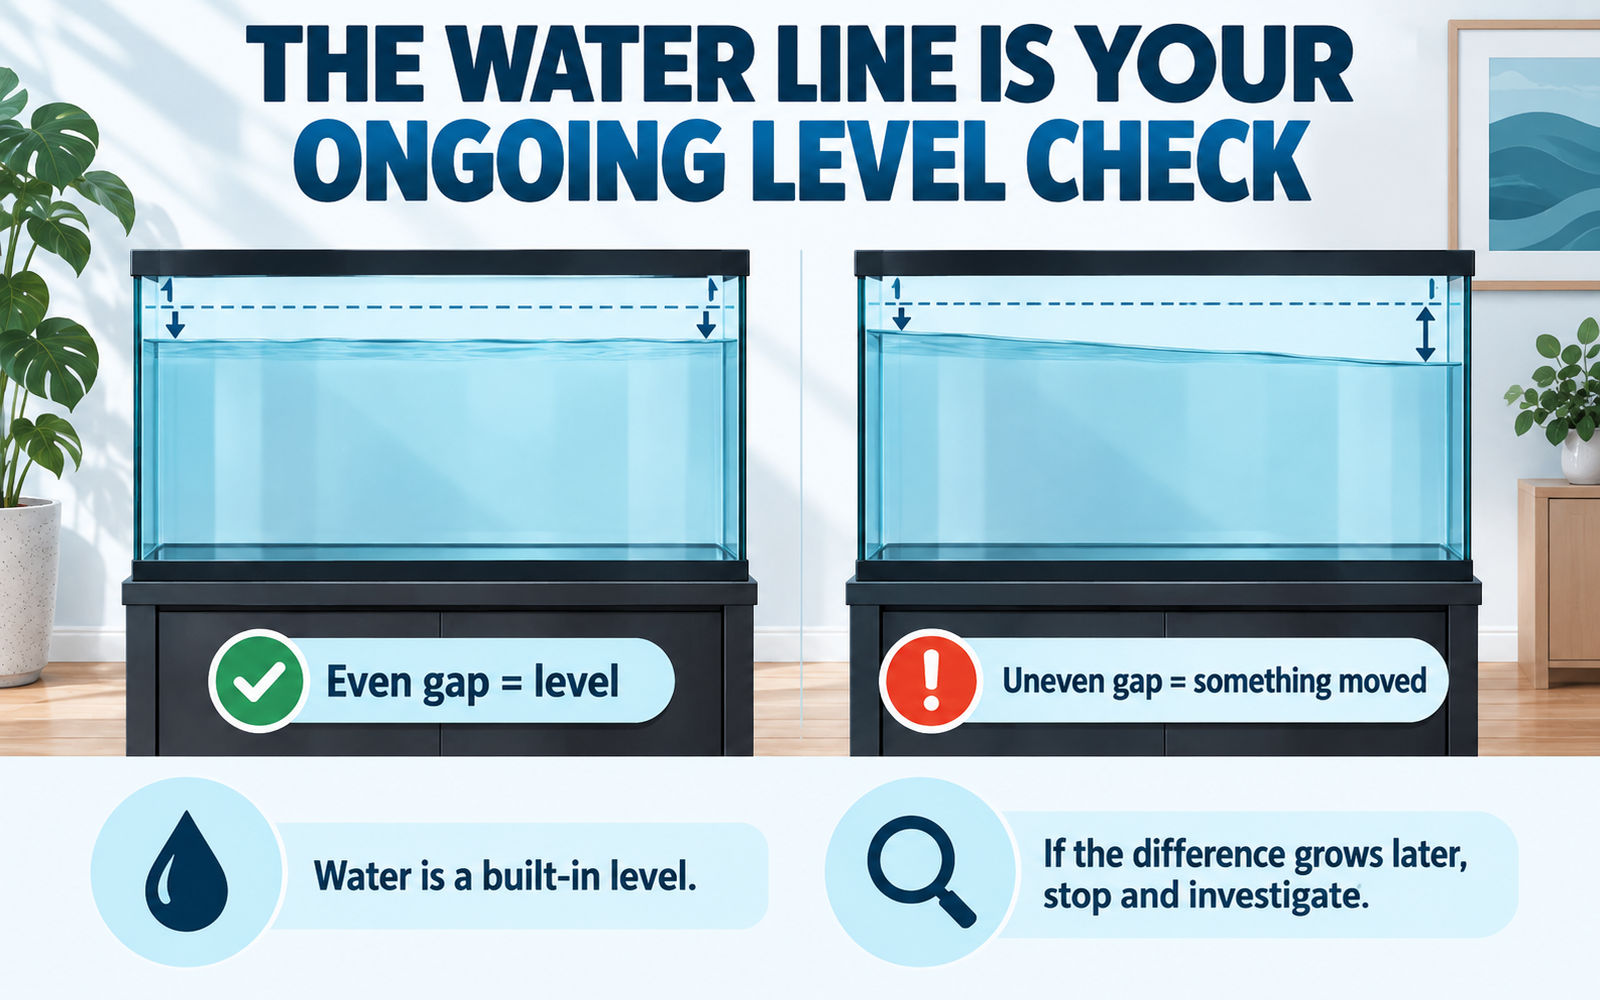
A small difference seen right after filling is best checked against the maker's tolerance, if one is given. A difference that appears or grows later means something has moved: the floor, the stand, or the carpet. That is a warning, not a curiosity.
If You Find a Problem After the Tank Is Full
Do not try to shim, lift or slide a filled tank. Water adds weight and moves as the tank flexes, and the load rides onto whichever corner you disturb.
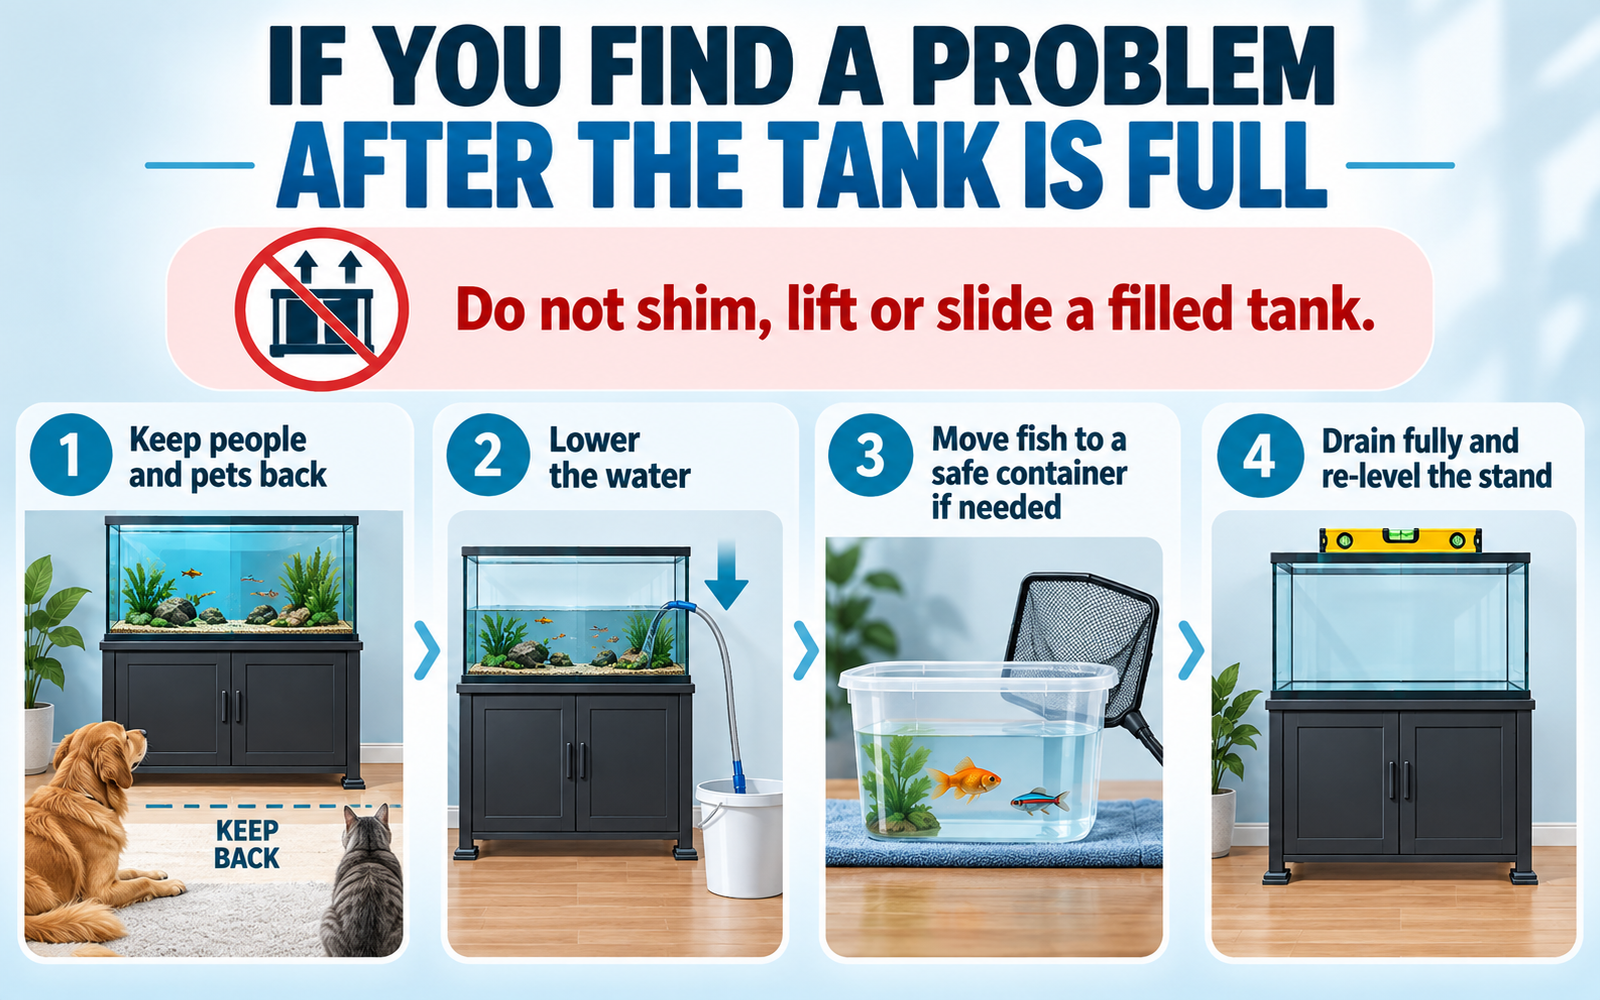
Instead:
- Stop adding anything and keep people and pets back.
- Lower the water, moving fish to a safe container as needed. Our aquarium emergency guide covers doing this calmly.
- Drain the tank completely, remove the substrate, and lift it off with help.
- Re-level the stand, and if the floor has moved, have it assessed before refilling.
After a full drain, the biological filter needs protecting. Keep filter media wet in tank water, and review how to cycle a new aquarium for what to watch while it settles.
Power Goes On Last
Leveling is also the right moment to plan power. Once the tank is level and filled, then install equipment, and follow these points:

- Plug everything into a GFCI-protected outlet. The Electrical Safety Foundation International says a GFCI "should be used in any indoor or outdoor area where water may come into contact with electrical products" (read September 11, 2026).
- Give every cord a drip loop below the outlet so water running along the cord drips off before it reaches the plug.
- Keep power strips up off the floor and out of the path of drips.
- Leave wiring changes to a licensed electrician.
The first aquarium setup checklist puts leveling ahead of filling and equipment, in that order, for these reasons.
FAQ
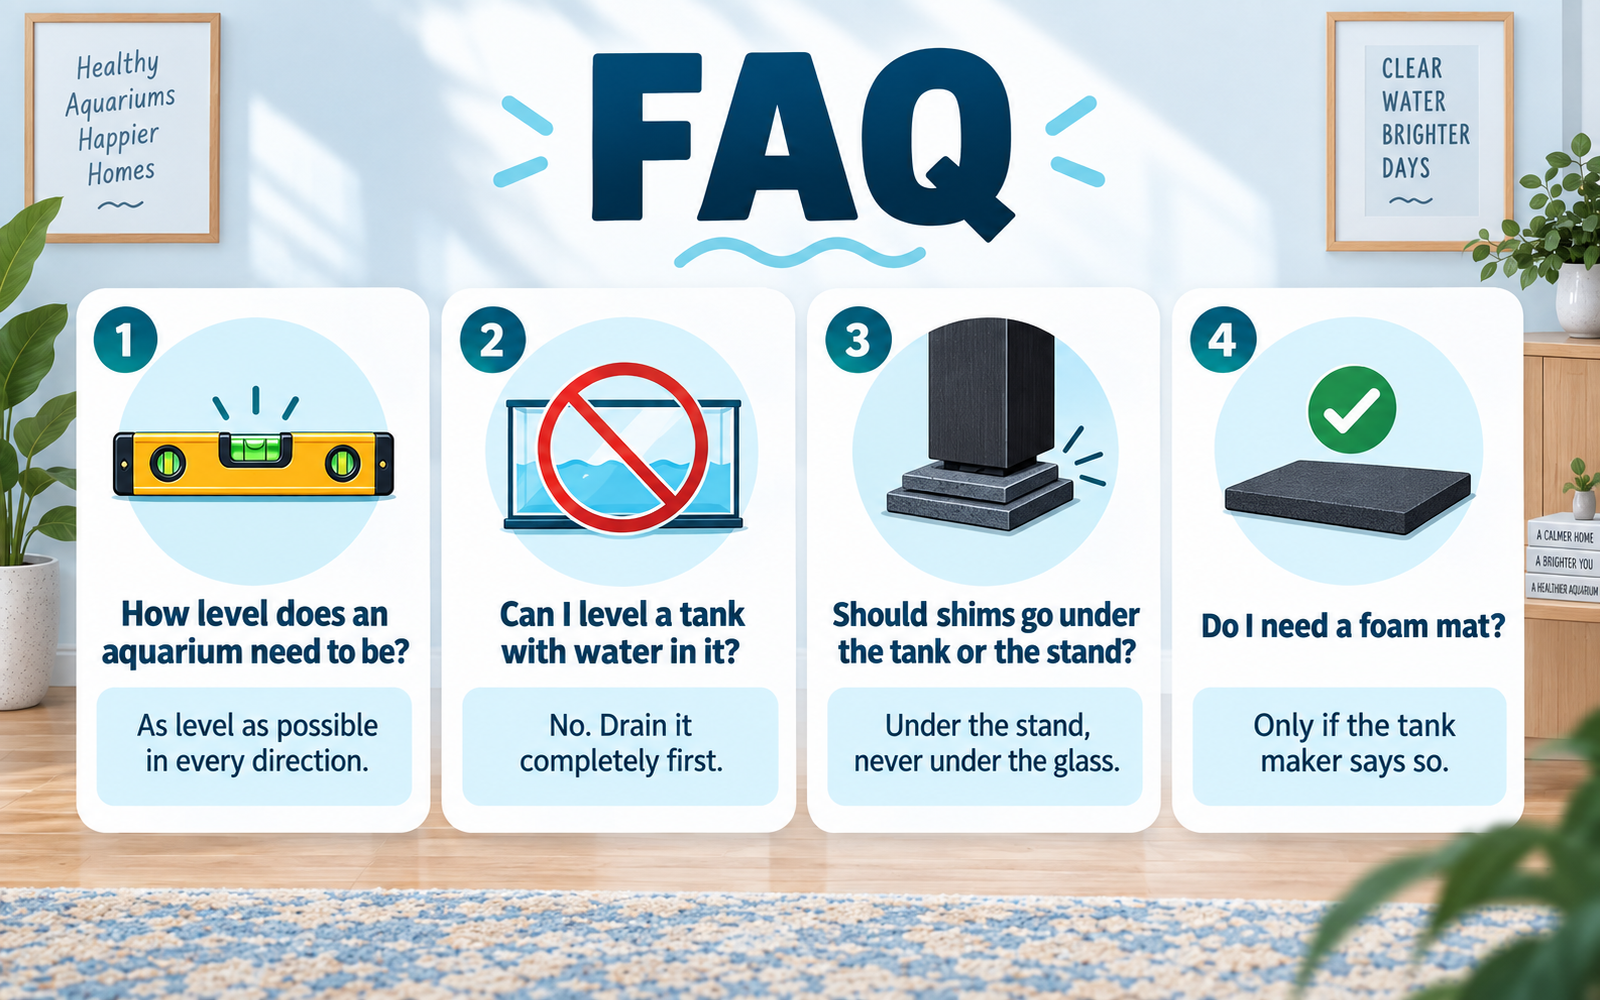
How level does an aquarium need to be? As level as you can get it with a good spirit level, in every direction. For a specific tolerance, use the figure in your tank maker's instructions; makers differ, and this site does not guess one. The water line, once filled, should sit evenly against the rim at both ends.
Can I level a tank that already has water in it? No. Never shim, lift or slide a filled or partly filled tank. Drain it completely, remove the substrate, lift it off, level the stand, and then set it back.
Should I put shims under the tank or under the stand? Under the stand, at the points where it meets the floor, directly below its supports. Shims under the tank put its weight on small points, which is exactly the stress glass cannot spread.
Do I need a foam mat under my tank? Only if your tank maker says so. Some designs call for one and some do not. A mat evens out tiny imperfections in the surface; it does not fix a stand that is out of level.
Level is the cheapest safety step in the whole setup. It takes a spirit level, some shims, and patience before the water goes in.